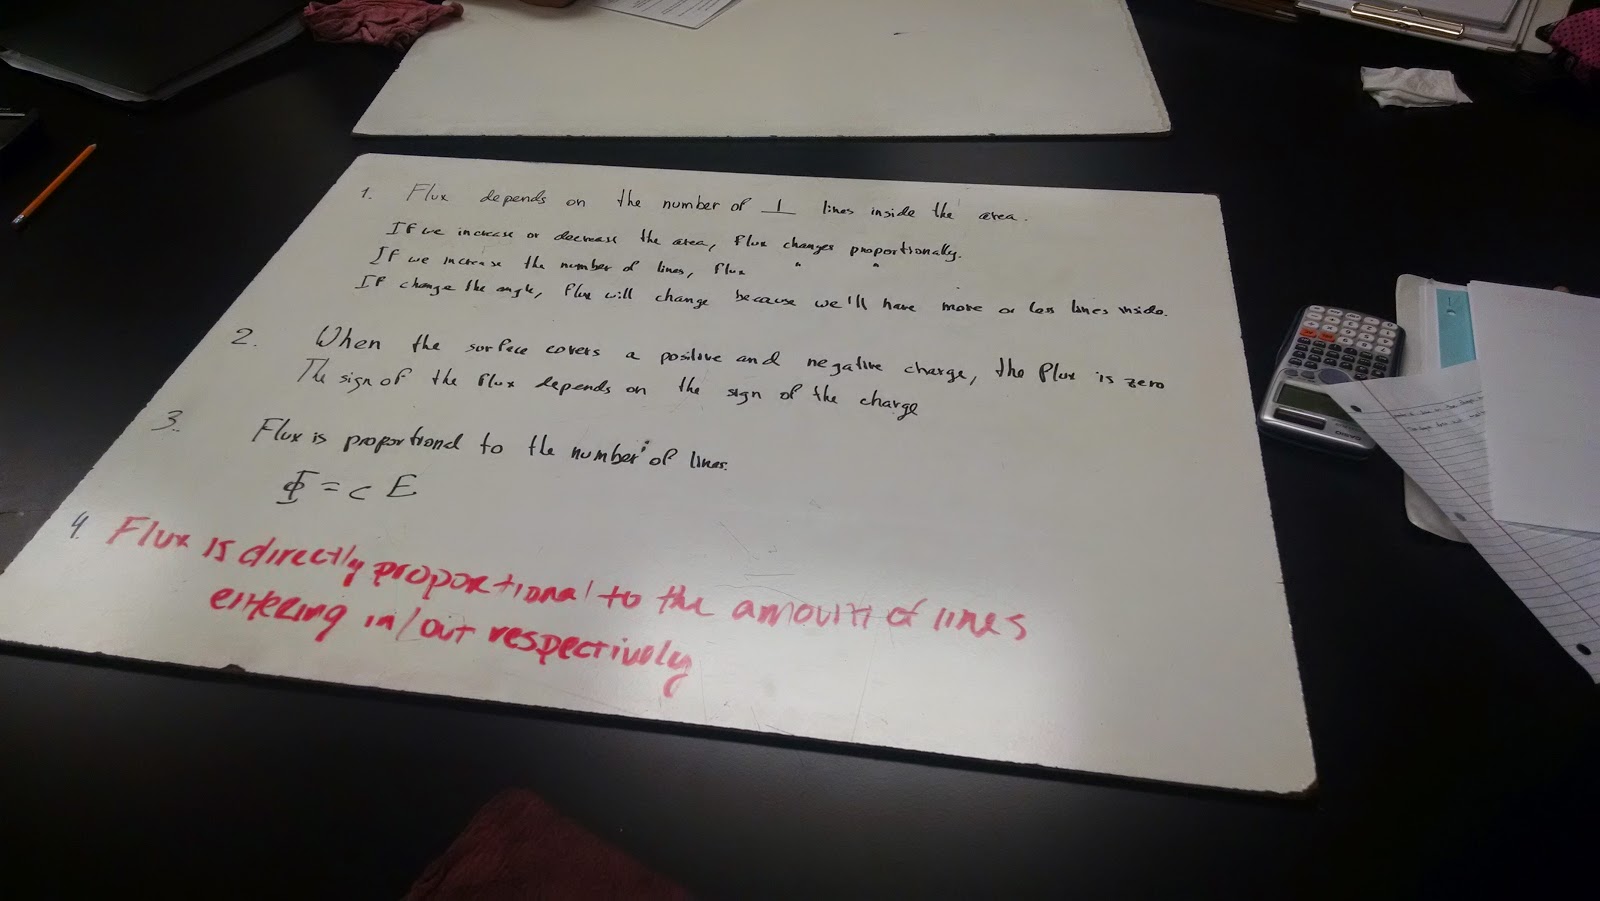
In this class period, we studied about electrostatic forces, focusing on repelling and attracting, Electric Force, and Coulomb's Law
Exploring the Nature of Electrical Interactions:
We started the lab with a simple experiment, by charging a balloon with two different charges, one with an animal fur, another with thin rag, we theorized what would occur to the balloon when placed on a glass object in each cases
 |
| Test one - Animal fur |
\
With the animal fur, we predicted that rubbing the fur on the balloon will give the balloon a charge, and in turn when placed on the glass, will stick.
Additionally, with our free-body diagram, we show that since there is a force that is sticking on the wall (Electrical) that the said force would have to be bigger than its normal force
We turned out to be correct, that the balloon will indeed stick onto the wall, due to said electrical force
 |
| Test two - Thin Rag |
We stated that in this case, the same thing will occur as the animal fur case, with the only exception being that the charge on the balloon would be opposite to the charge that the animal fur gave
Again, we turned out to be correct that the balloon will again stick to the glass
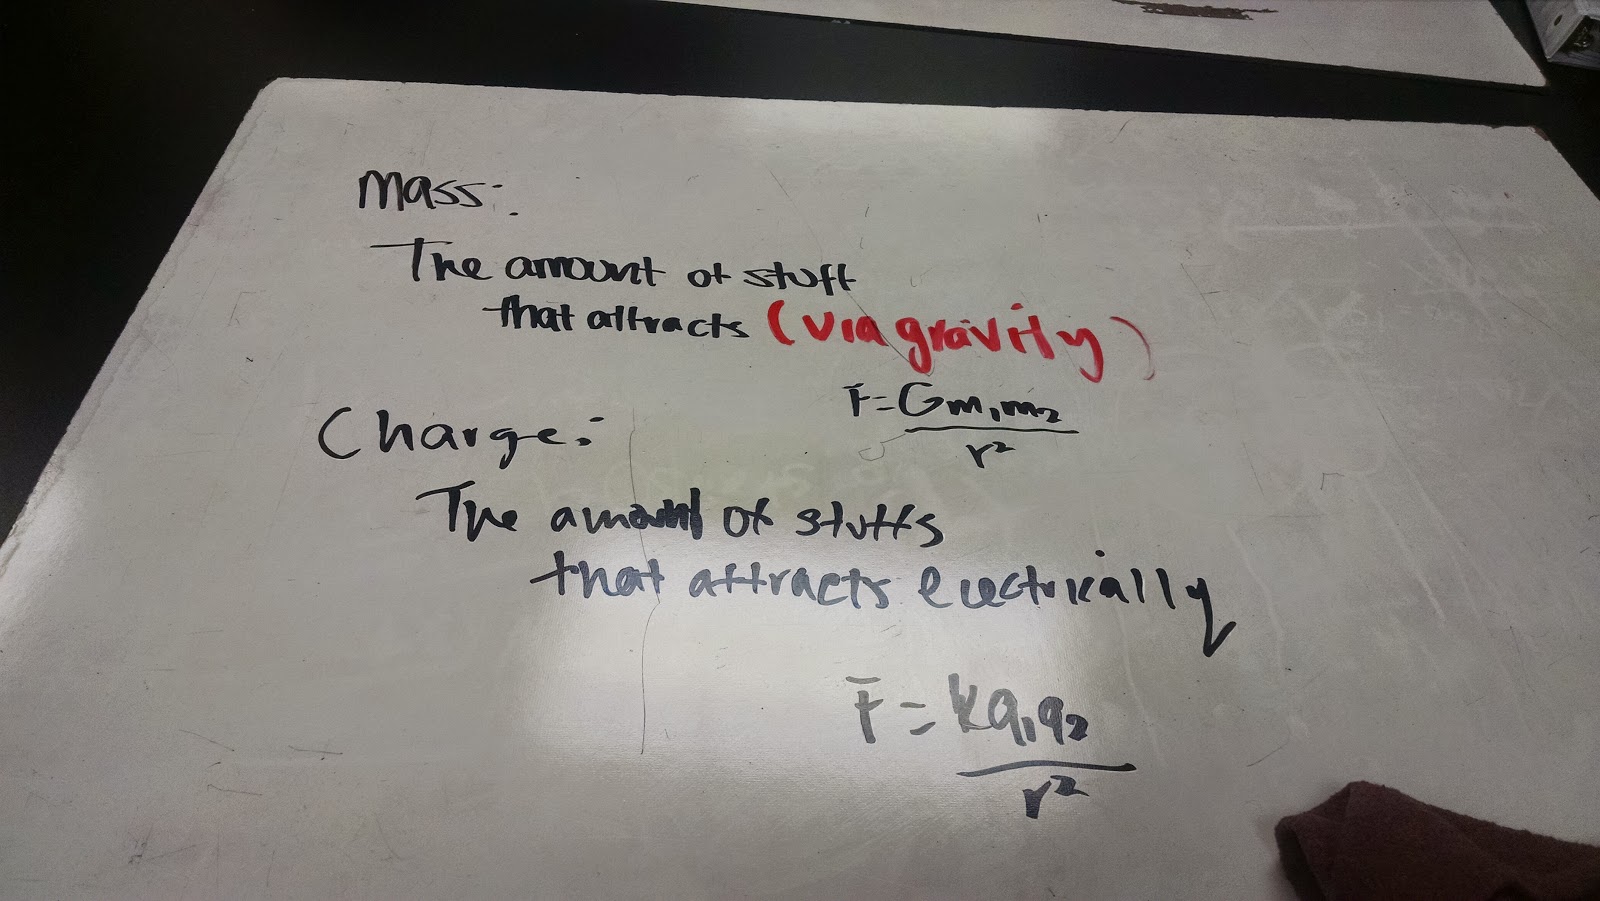 |
| Simple Definitions - Mass and Charge |
From this lab, we are able to assess a definition (that a 5th grader could understand) for charge, using a similar idea for the definition of mass
Next, we were asked to use pieces of tape to conduct two experiments
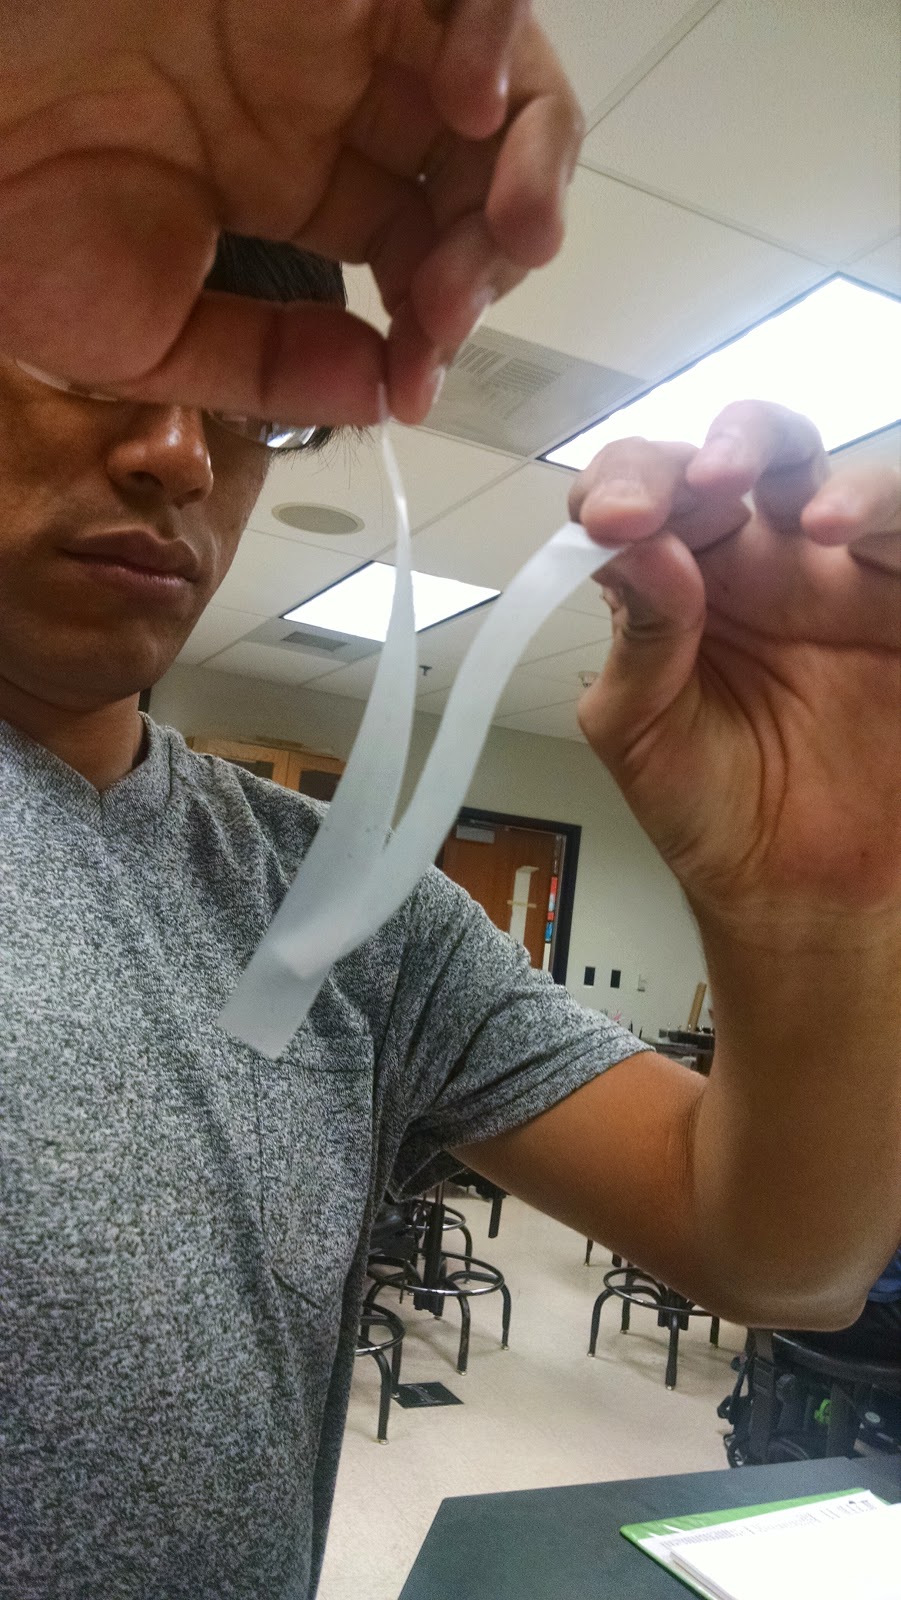 |
| Tape Test one |
The first tape test required us peel two tapes of similar size from a table and bring the non-stick ends to each other. Although the picture shows the tapes attracting, we made an error and placed two different sides of tapes to each other. When we placed the two non-stick ends together, after being electrically charged due to the quickness that came by removing it from the tables, the tapes repelled each other.
Additionally, we discovered that the farther away the tapes are from each other, the weaker the repel force was.
 |
| Tape Test two |
The second tape test required four tapes of similar size, and had us label the tape that would be on the bottom "B" while the top tape "T" as we stacked two tapes on each other. We then ripped them from the table and each other, and examined what the tapes did to each other. When we brought two tapes that were either labeled "B" or "T", they repelled each other, however, when a "B" tape and a "T" tape were placed next to each other, we observed an attracting force occurring
From this experiment, we can then concur that there are indeed two different types of charges when dealing with electrical forces, a repel charge and an attract charge.
Electrical Force Law: Video Analysis Activity
Before we began with the second lab, we had to review a few of the things that we learned back in Physics 4A before we can successfully graph a Electrical Force vs Separation Distance graph.
 |
| Calculating for theta |
First off, we were asked that given a ball that hangs on a string of length L, along with a vertical force that pushes the ball, to calculate for the angle of the ball.
We derived the angle to be equal the the arcsin of the separation distance divided by its length
 |
| Calculating for the horizontal force (Electrical Force) |
Using what we just calculated, we then needed to find the horizontal force that the ball experience when it is being pushed
We calculated that for to be the mass times the gravitational field strength constant of earth times the tangent of the arcsin of the distance of the ball divided by its length.of the rope
This calculation will prove useful on as we need to be able to calculate the electrical force that occurs within the lab.
 |
First portion of the lab
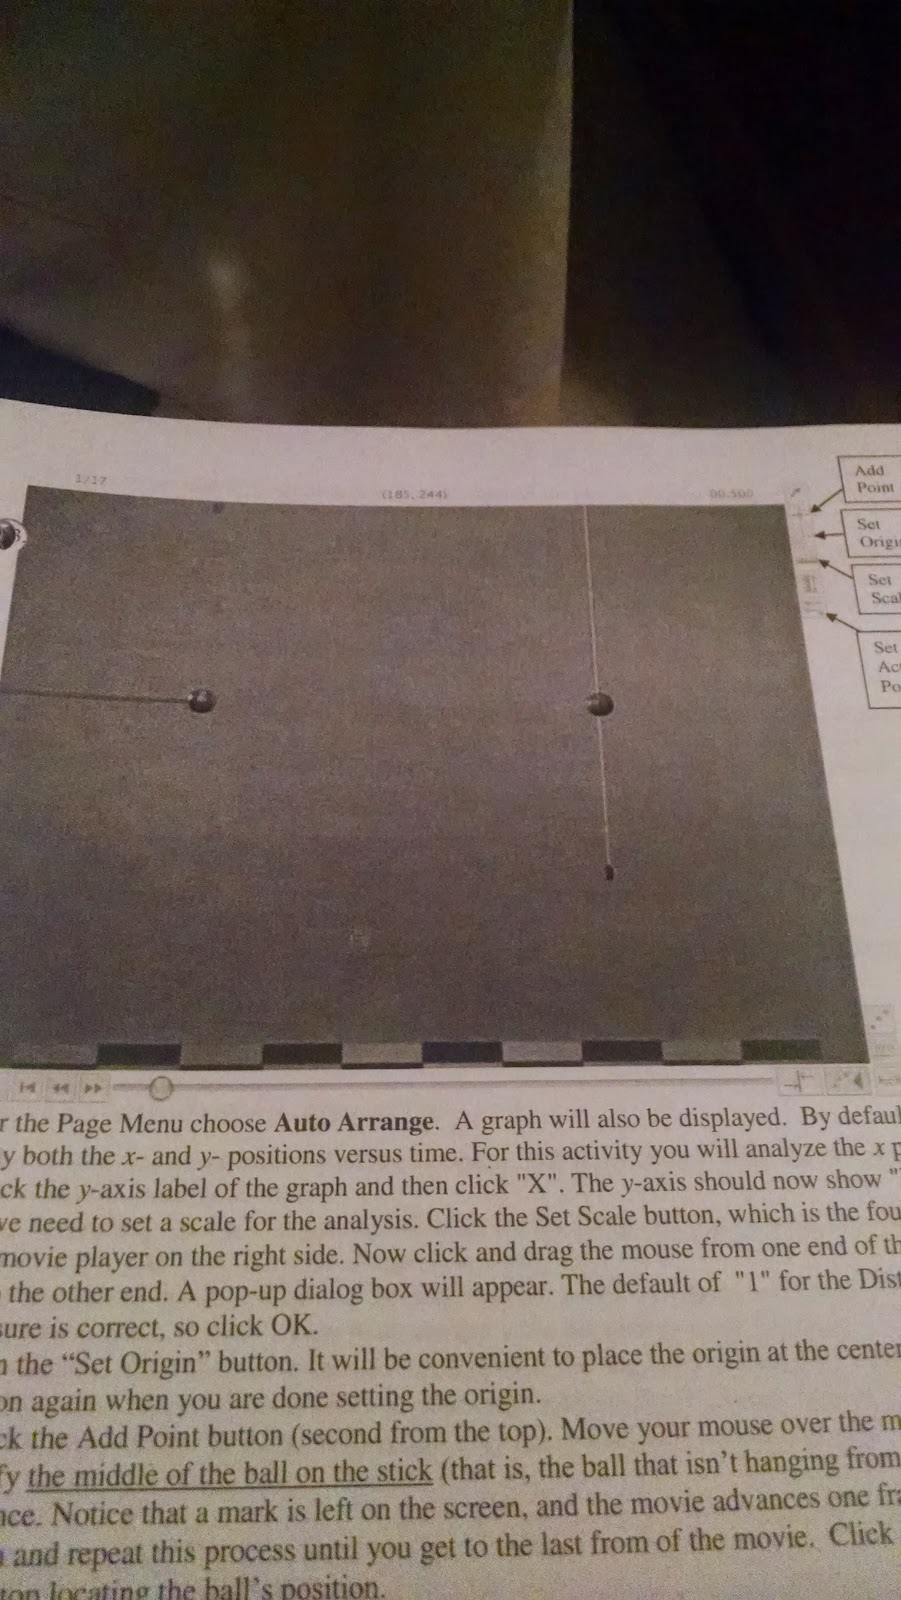
Measuring distance |
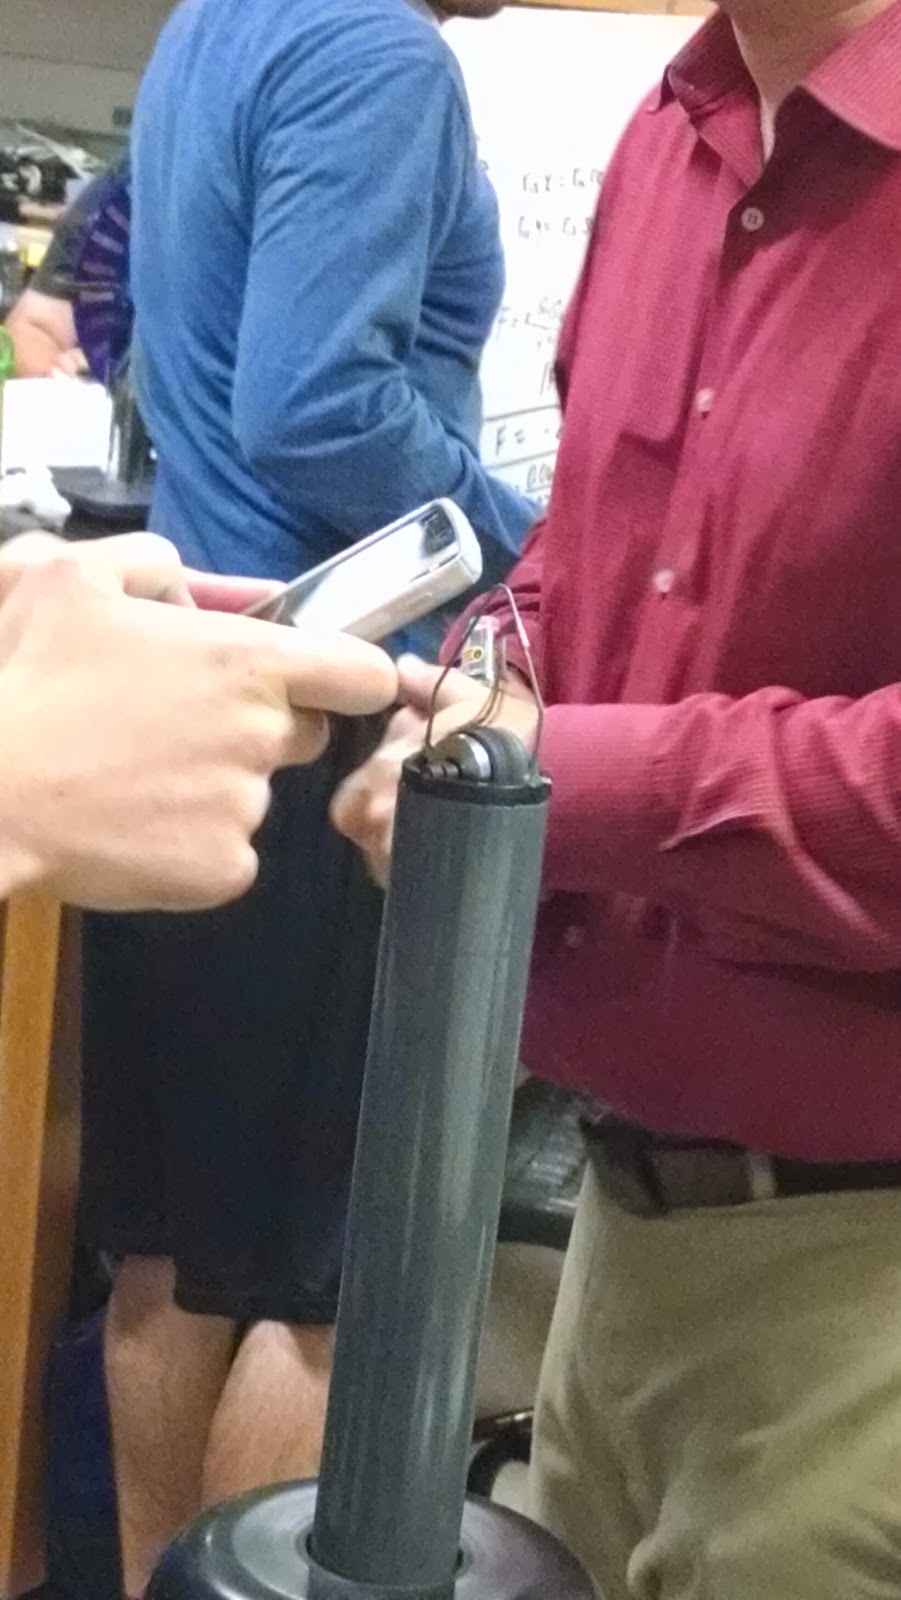
We then began the lab by opening up Loggerpro and obtaining a video of what the picture to the left shows, two balls of equal mass, one hanging stationary and the other on a stick moving until both balls repel each other, forcing the second ball to move as well. Using the tools provided for us in Loggerpro, we are able to set an initial position for each ball, and give both the balls a point for each frame that the ball on the stick moves closer to the stationary ball.
It was important to know that the mass of the ball was about 2.93 grams, while the length of the stick was about two meters.
 |
| Obtaining a Separation distance vs time graph |
After some messing around with the data we got, removing the y-axis from the equation, since we mostly deal with the x-axis, and calculating the separation distance, which is the distance of the ball on the stick, minus by the hanging ball, we were able to get this clean graph of separation distance vs time graph
However, within the lab report, the question asked us to create an Electrical Force vs Separation Distance graph, meaning that we were still missing the electrical force that is required.
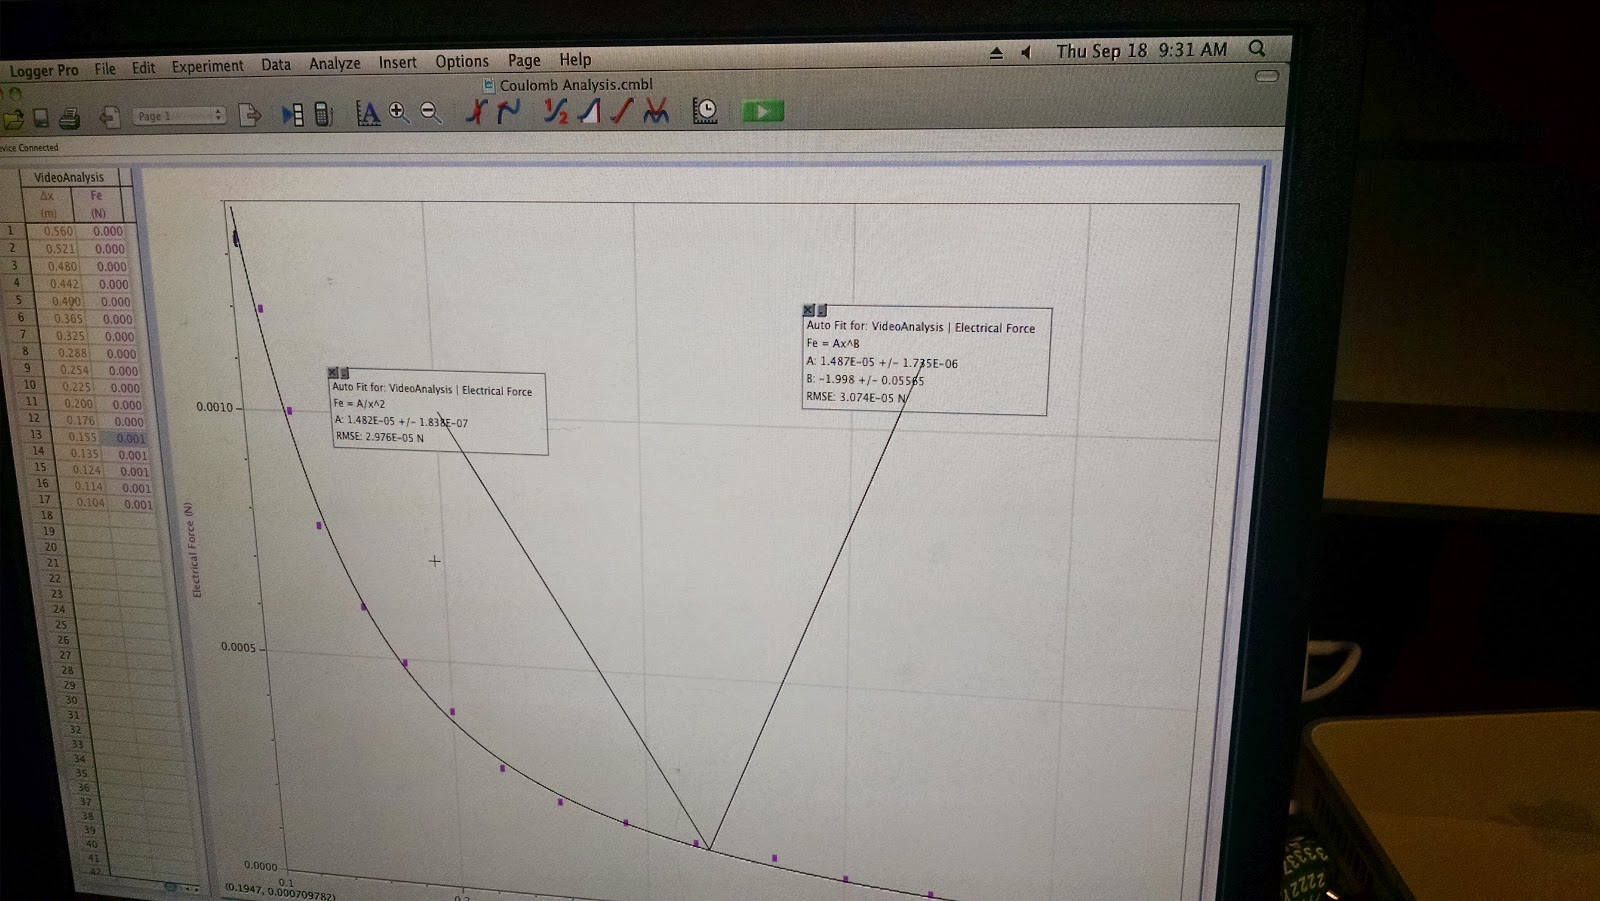 |
| Electrical Force vs Separation Distance |
By recalling the equation that we found for a horizontal force in the exercise (F=mgtan[arcsin(X2/L)])
We were able to calculate for the electrical force, and by using the calculated column tool in Loggerpro, successfully plug it in to the graph to obtain an Electrical Force vs Separation Distance graph
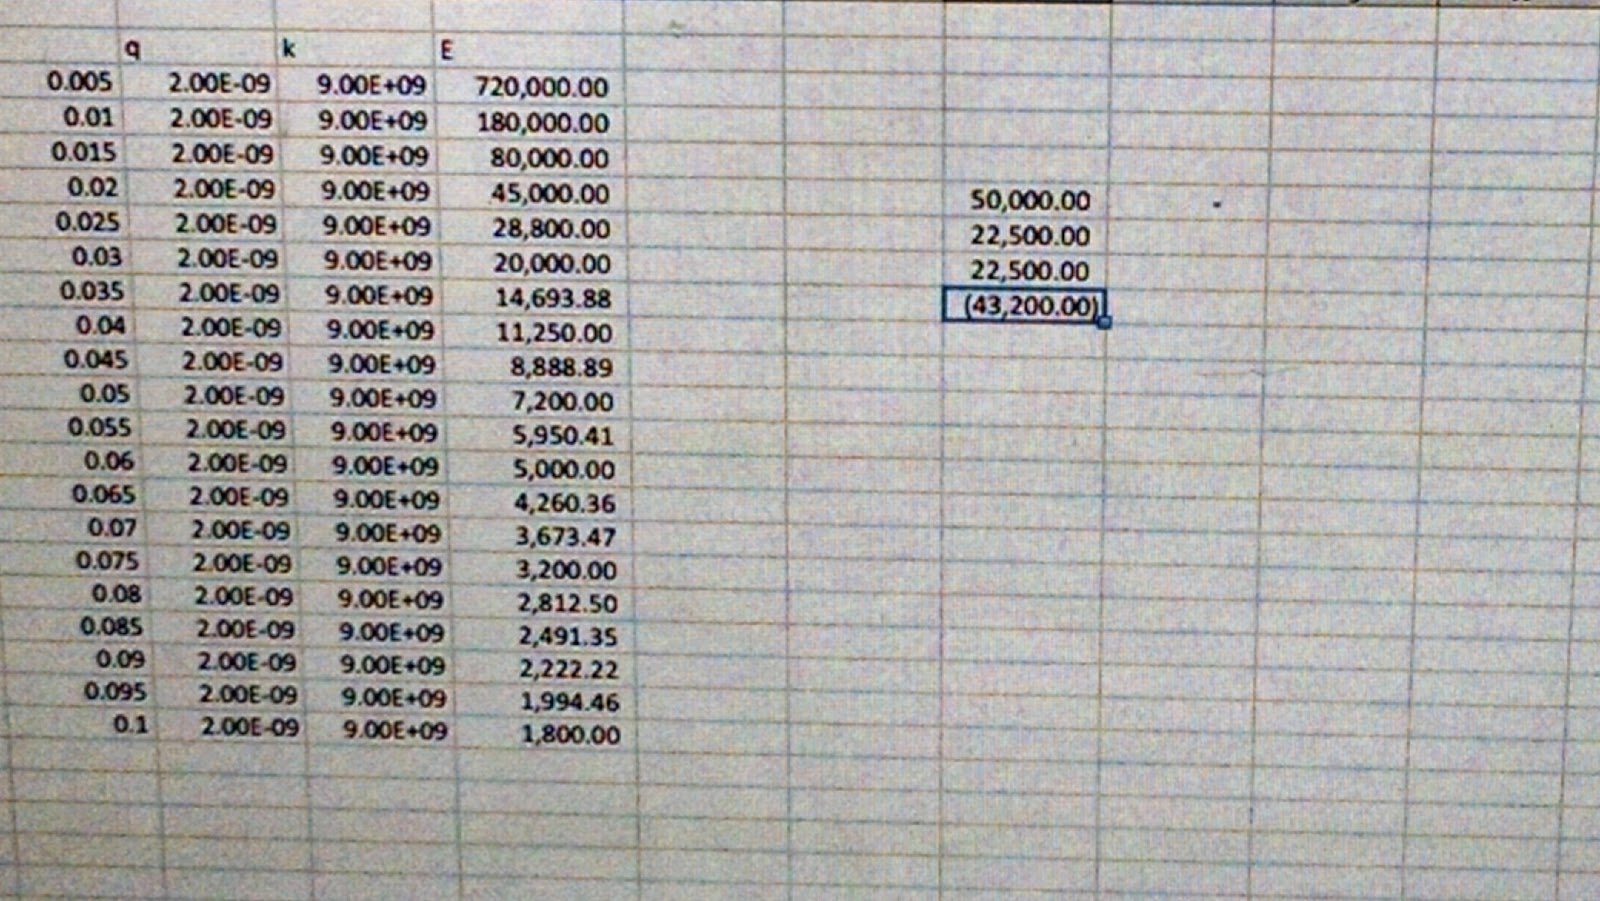
Its to note that the graph tells us that the relation between these two functions are inversely proportional.
CONCLUSION:
 |
| Conclusion Work |
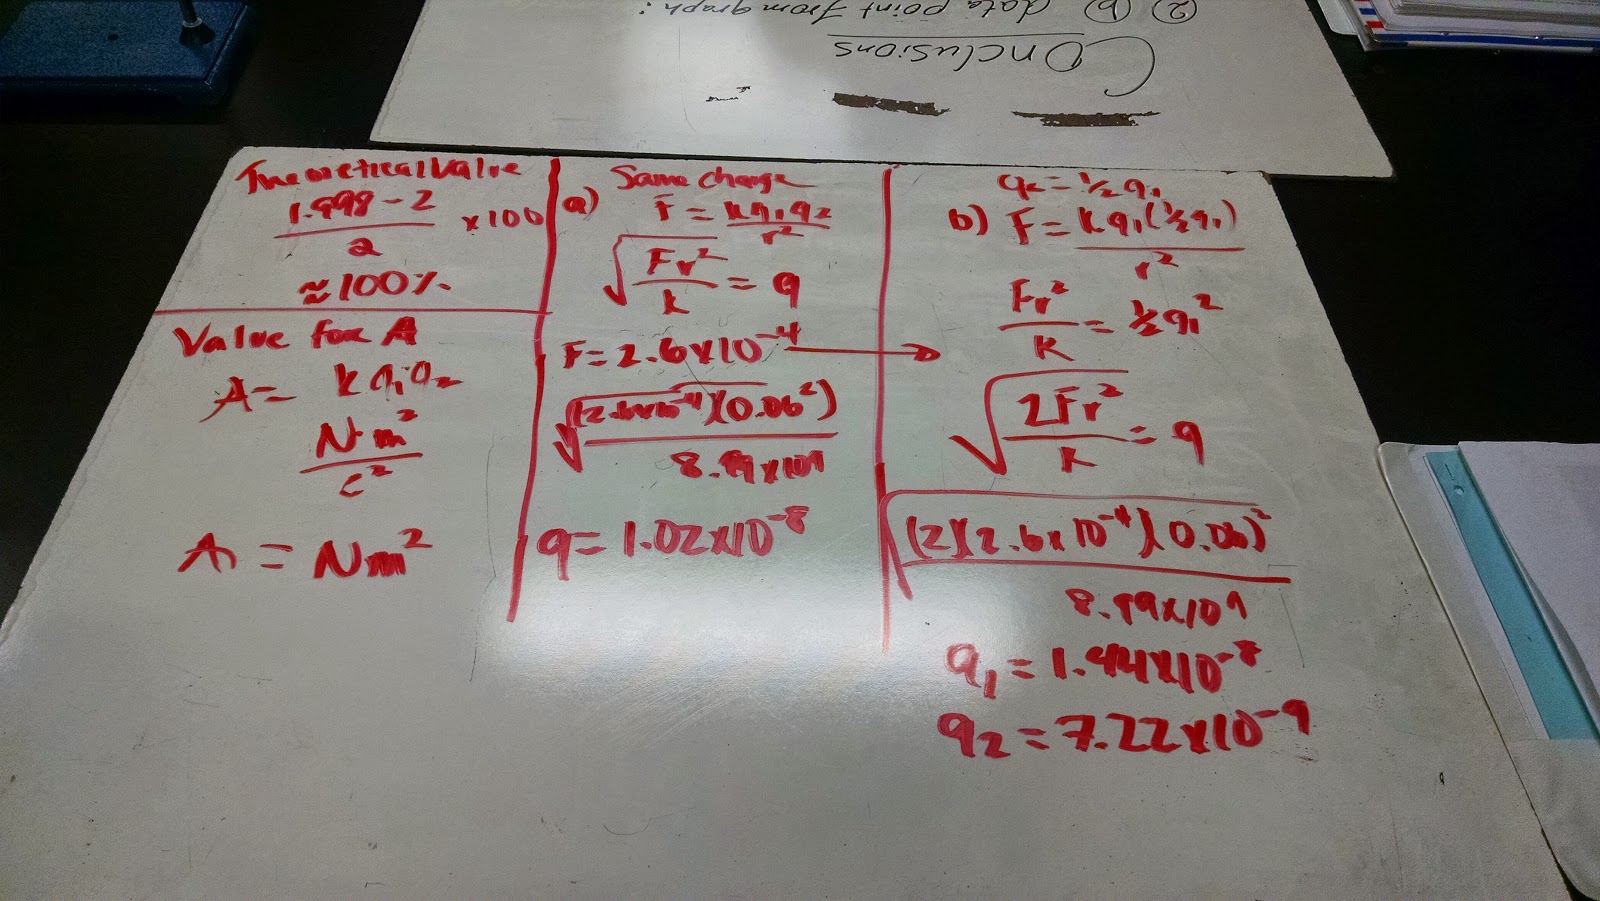
From this experiment we were able to find the relationship between Electrical Force and Separation Distance, in that they are inversely proportional to each other. Additionally, by examining the B on the F=Ar^B, we find that B equals to about -1.998, which is surprisingly close to -2, the experimental value for B, which shows the the relationship is actually an inverse squared proportion.
The percent difference that was calculated within this equation is rounded to be 100%, with any experimental error caused due to imprecise clicking, when it came to tracking each of the balls when it came to analyzing the video. The picture above shows calculations of the charges when they are equal to each other and when q1=1/2 q2
It is to note that we cannot determine the charge of the balls in this experimentation. It is so due to the fact that the balls were repelling each other during the video. As repulsion between two objects occur whenever both objects are either positively or negatively charge, we can state that we cannot determine the nature of the charges of the ball.
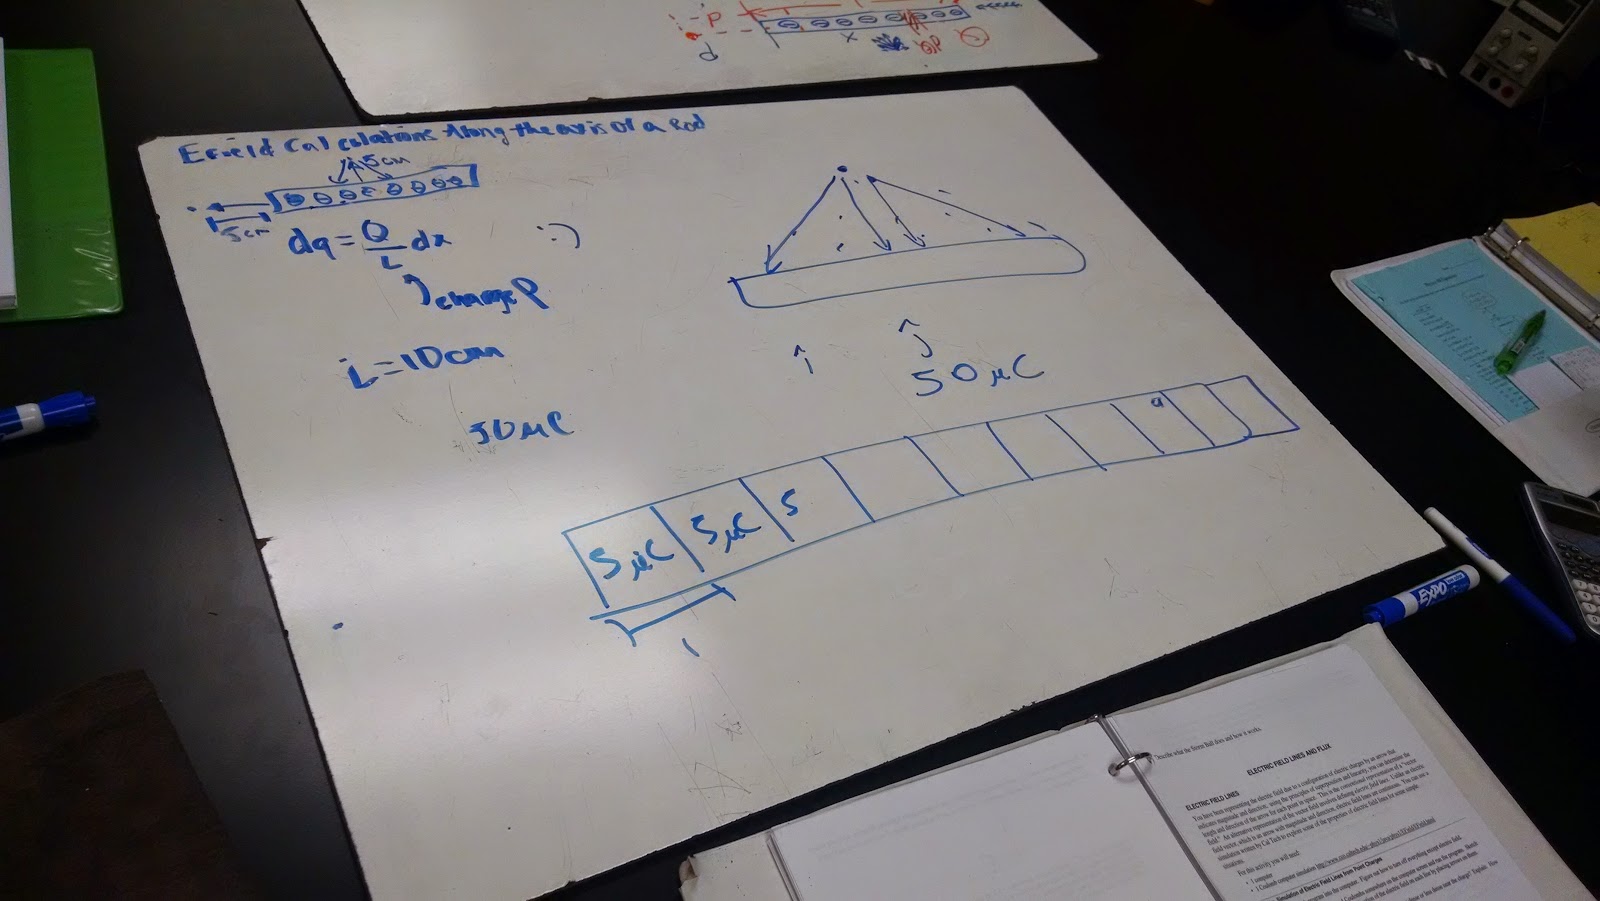
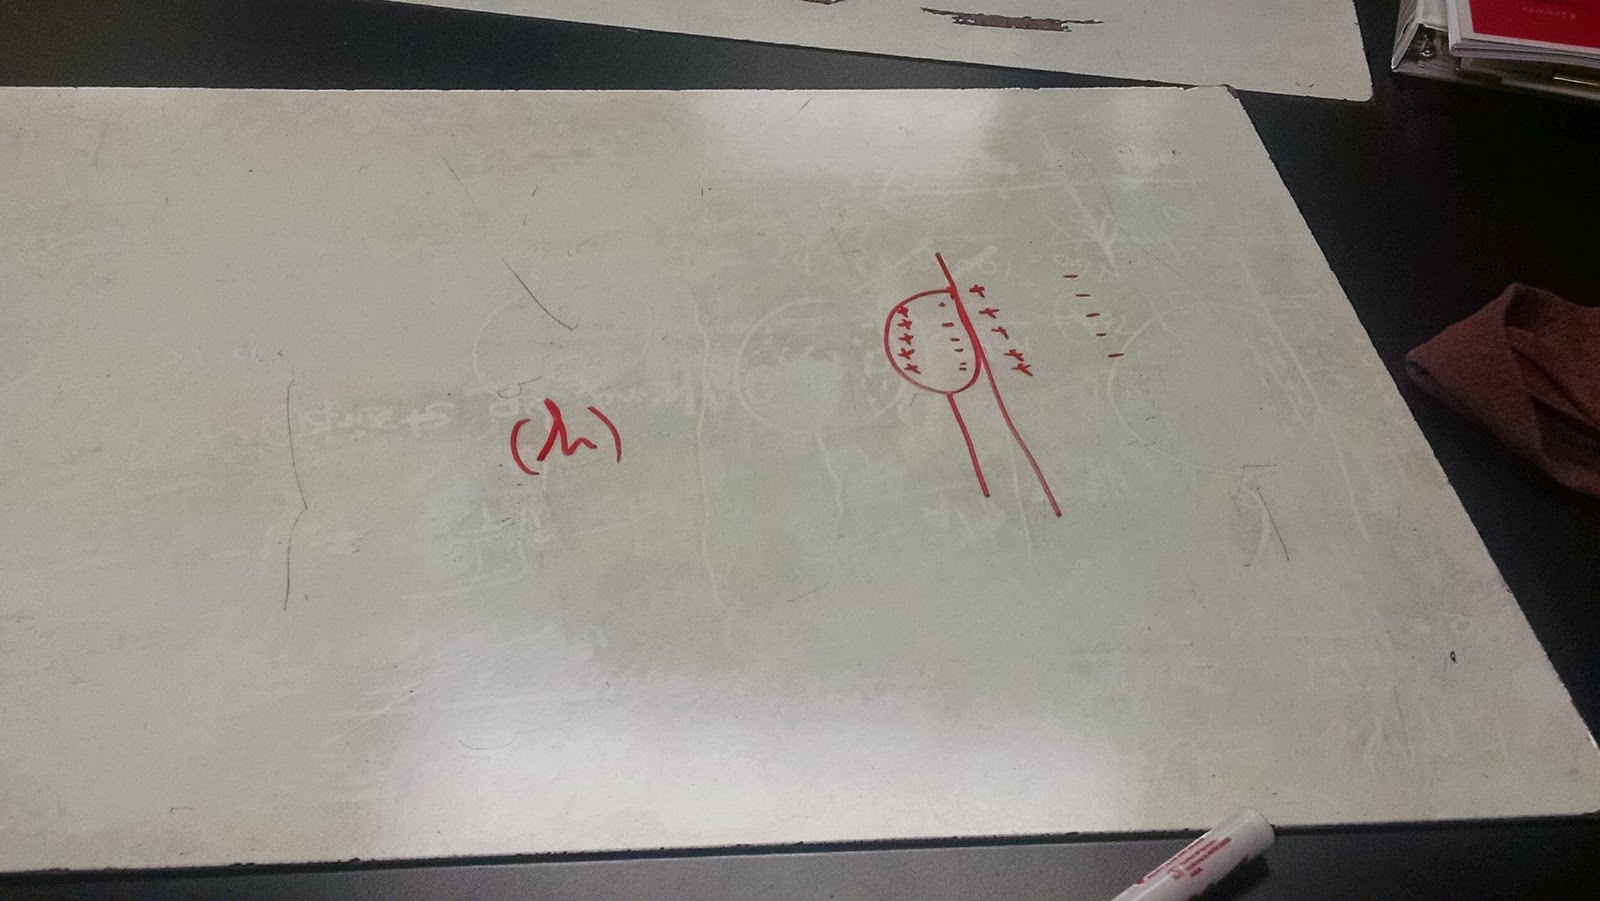
The Mathematical Formulation of Coulomb's Law:
We then decided that it was time to get a clear derivation of Coulomb's Law, using what we have learned form
 |
An incomplete Coulomb's Law - along with
attracting and repelling forces |
The picture to the left shows a semi-finished Coulombs Law equation along with the sign and the direction of a charged (either positive or negative) particle
It is to note that if the charges are either both positive or negative, that the direction of the force is then positive (to the right), however the direction of the force is negative (to the left), if the particles have different charges. This is due to the fact that one of the particles are negative, and since the Coulomb's Law shows a multiplication, it means that we are multiplying by a negative number. This means that whenever the Coulomb's Equation yields a negative number, we are dealing with an attractive force.
It is also to note that Force and charge are directly proportional to each other, and as the charges decrease, the Force must decrease as well.
It is to also note that since we have proved that force and distance are inversely squared proportional to each other, as the distance between the particles decrease, the force vastly increase.
We then prove that Coulomb's Law is in fact consistent with Newton's Third Law, showing that the Electric force between two objects have the same magnitude, just different directions.
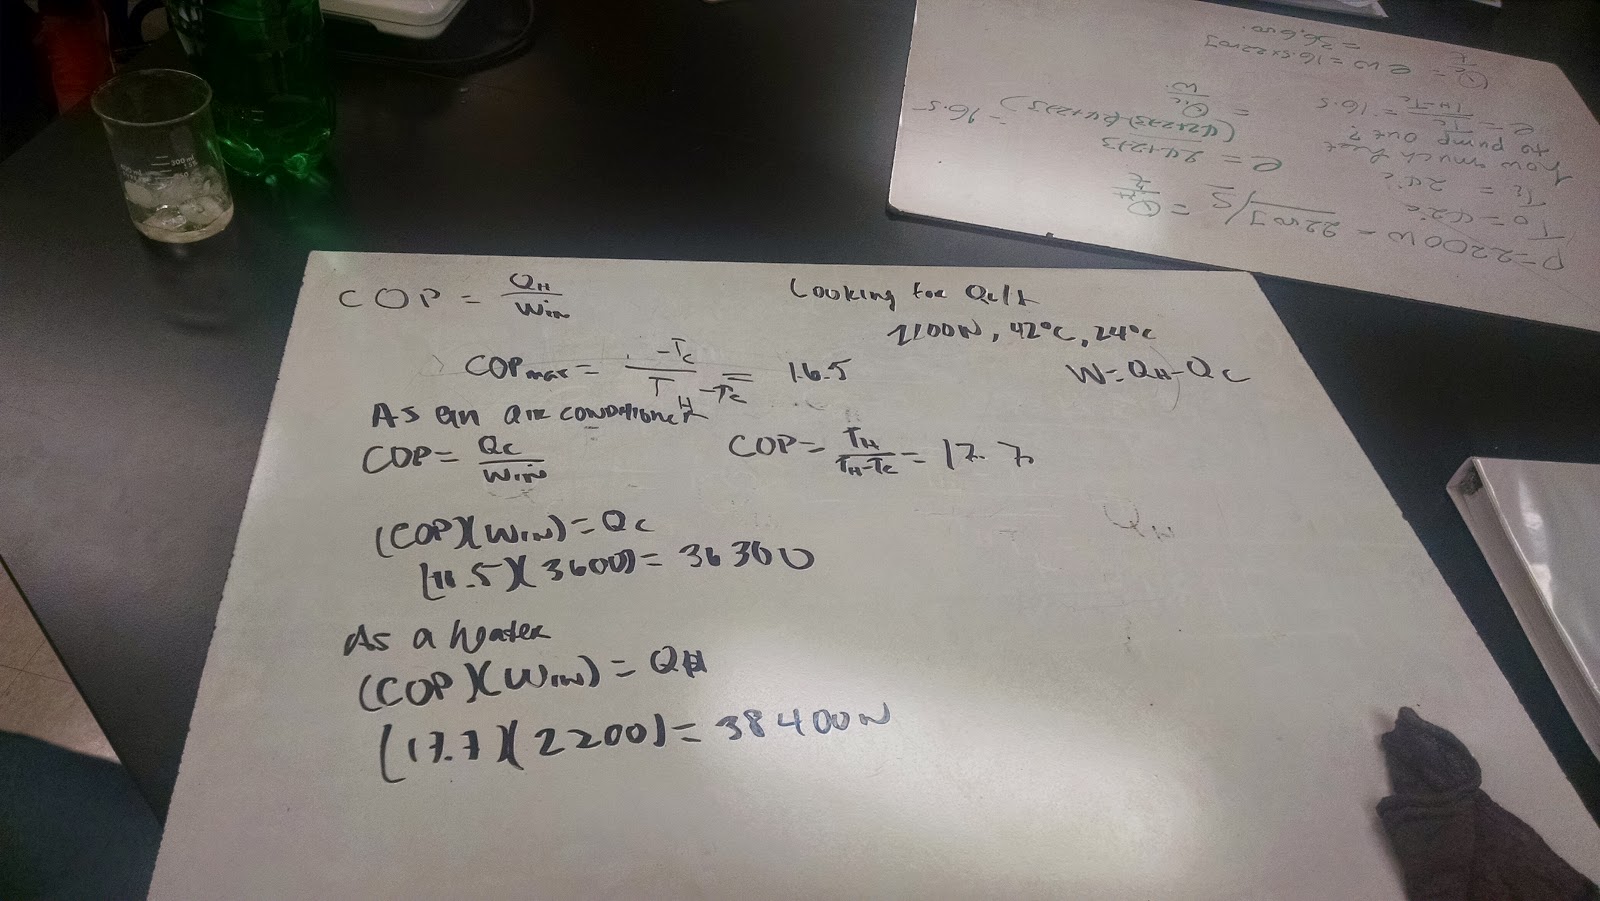
Using Coulomb's Law for Calculations:
After getting a clear derivation of Coulomb's Law, the next thing we did a class activity, solving problems using what we have learned
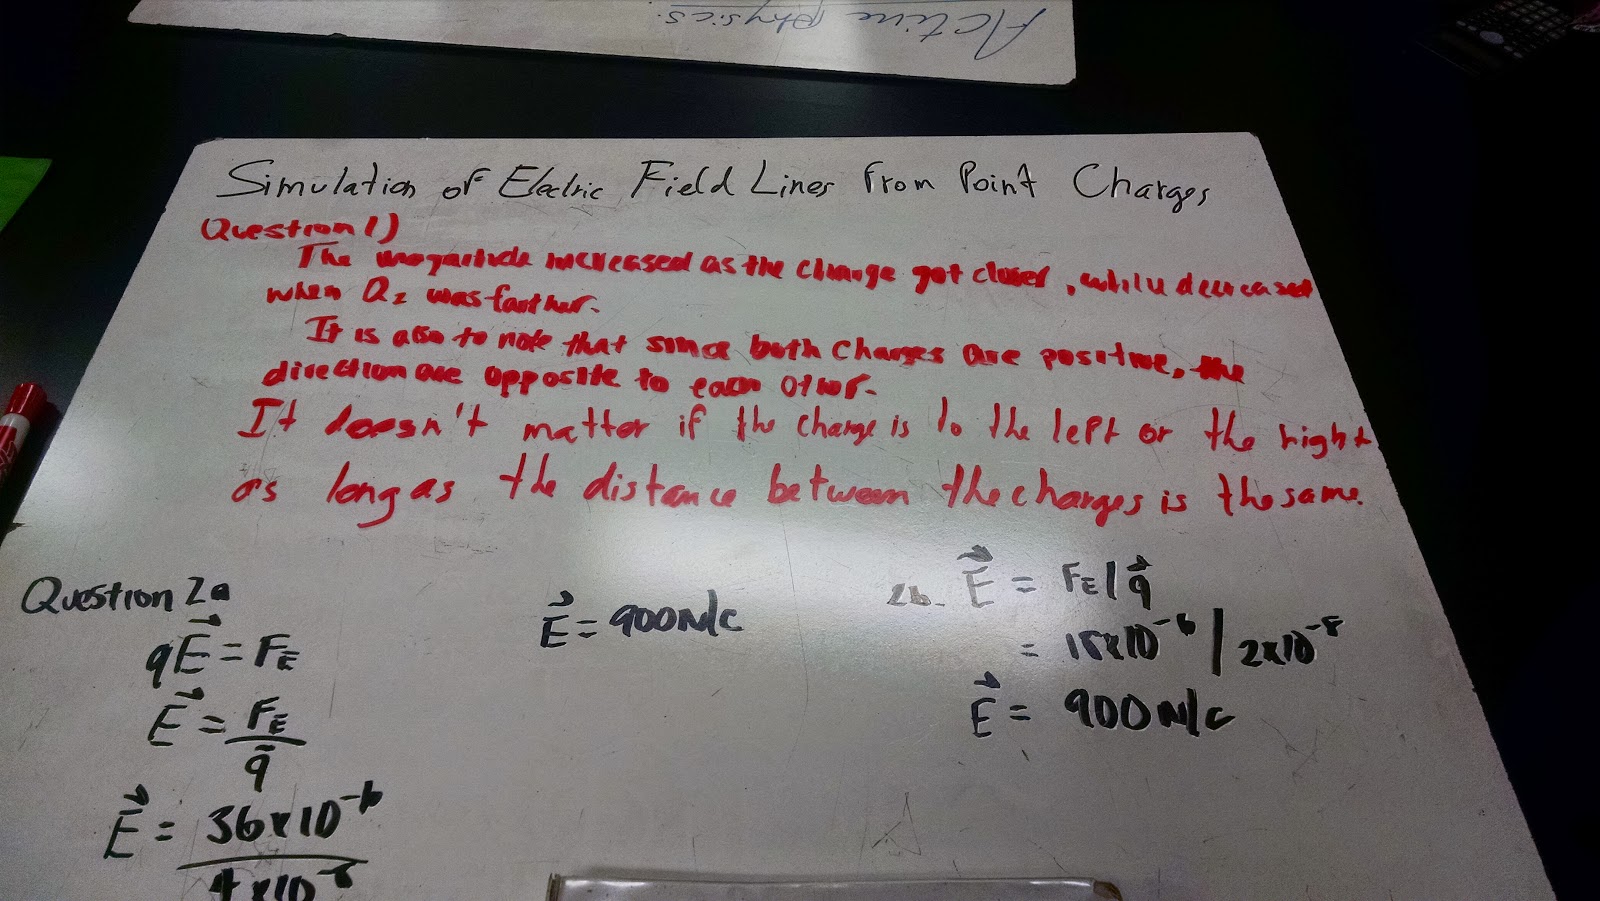
Question 1
 |
| Answering question 1 |
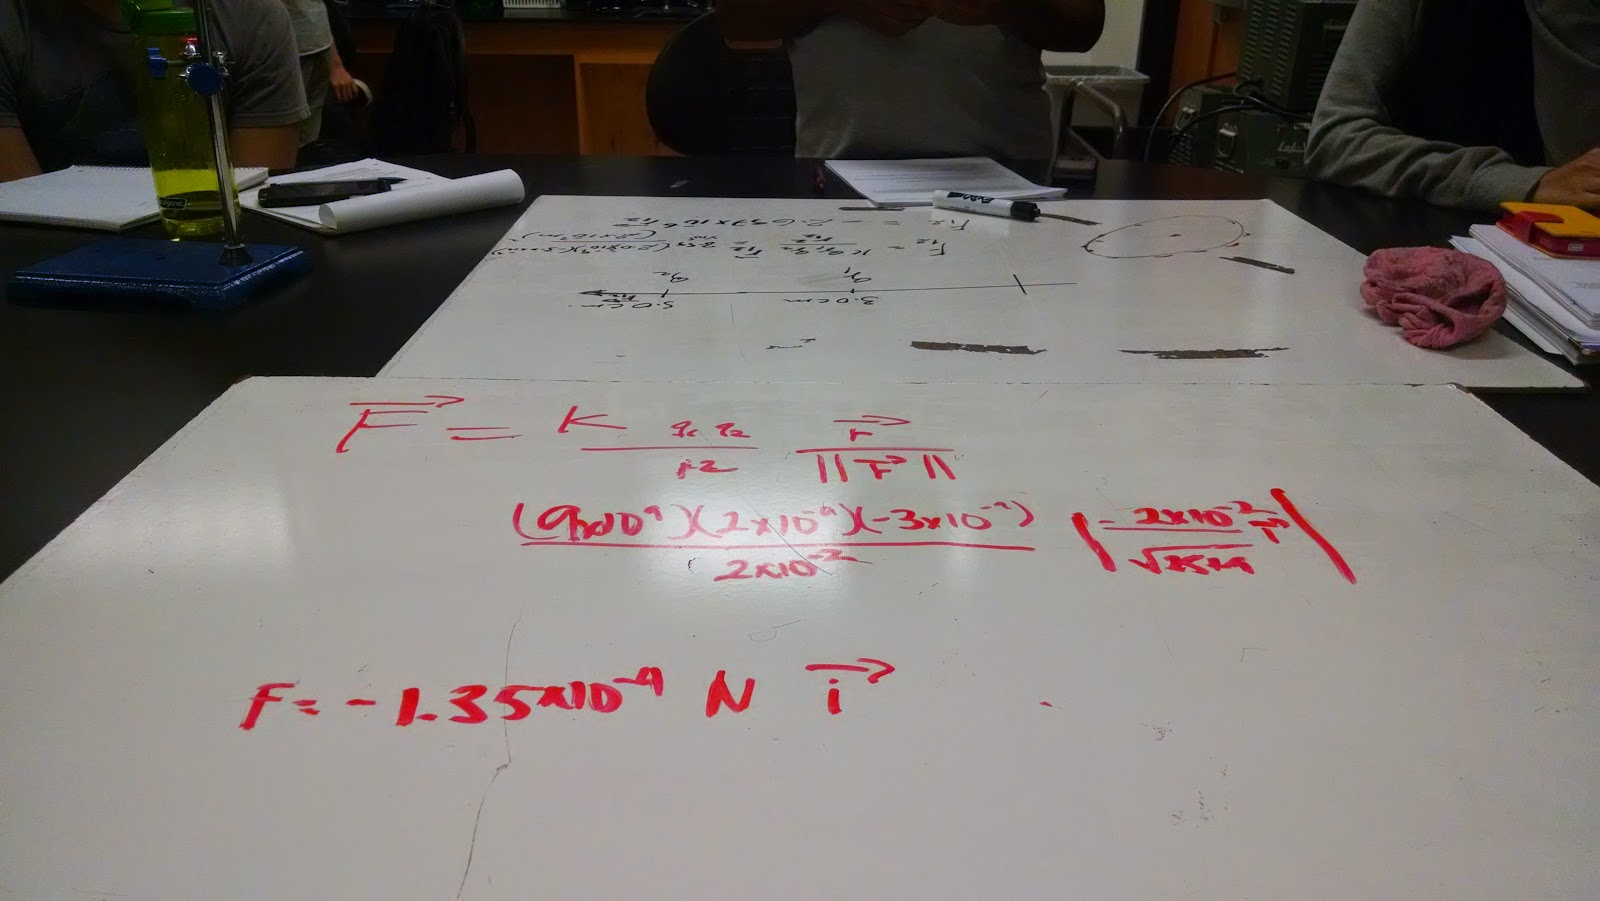
We were given two particles, both with given values in charge and location (2x10^-9 with x=3cm and 3x10^-9 with x= 5cm respectively). We were then told that this system was occurring in a one-dimensional environment, the x-axis. We are asked to find the magnitude of force, along with the direction
The answer obtain was about 1.4x10^-4 N in the negative x-direction, meaning that it was moving to the right.
Question 2
 |
| Answering question 2 part 1 |
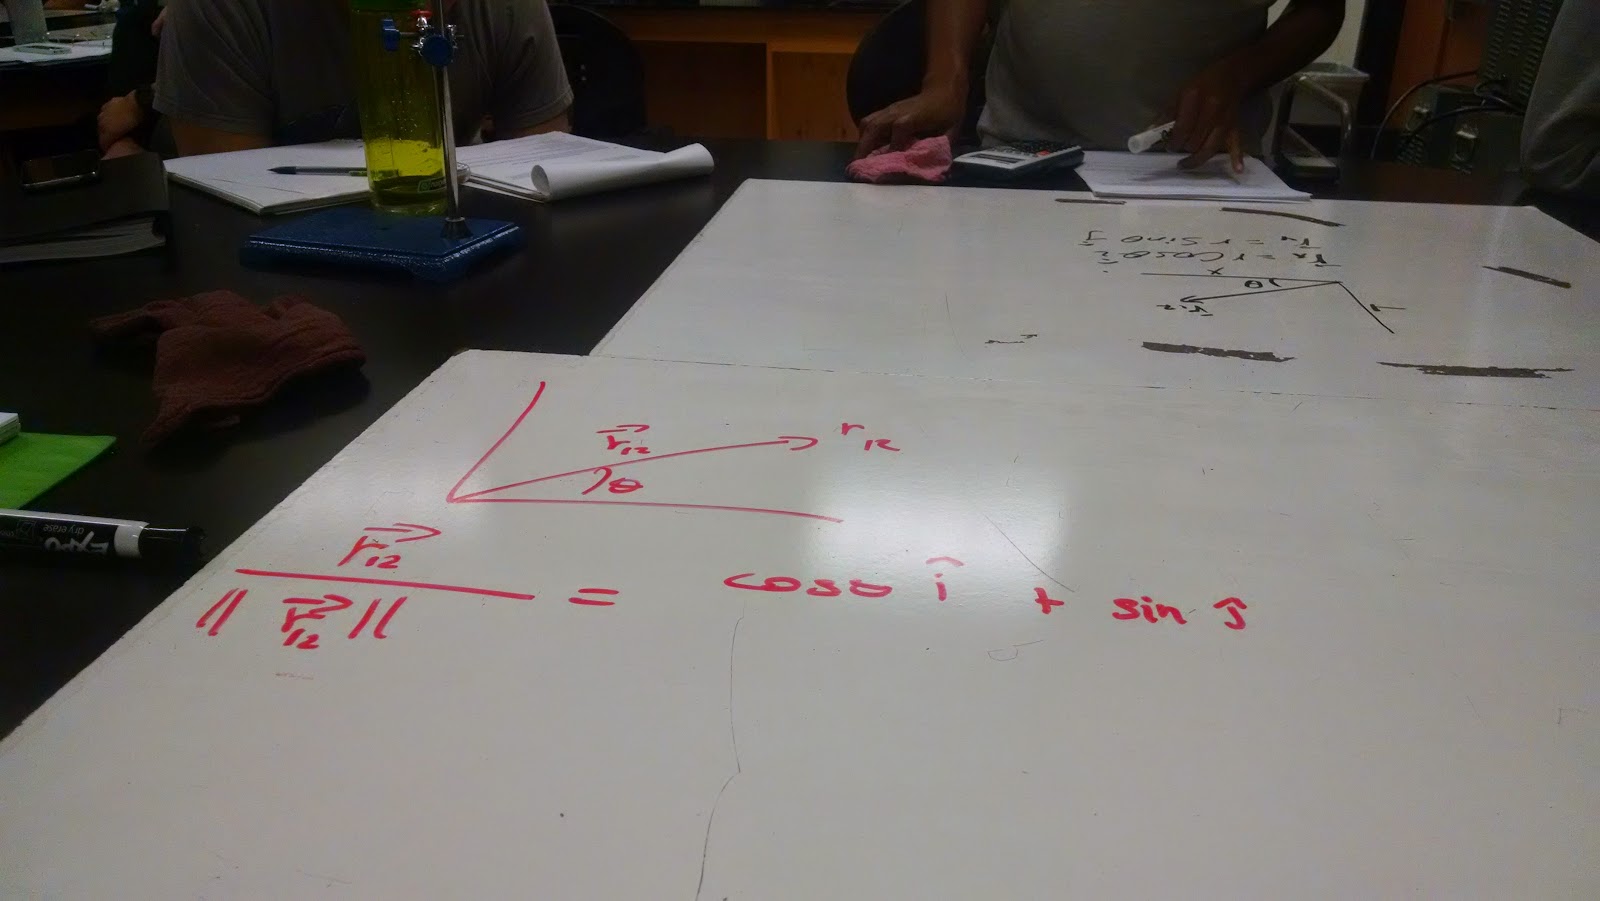
Question two is separated into two parts. The first portion of the question asked us to find its unit vector in the Cartesian graph, and express it in terms of cosθ and sinθ
 |
| Answering question 2 part 2 |
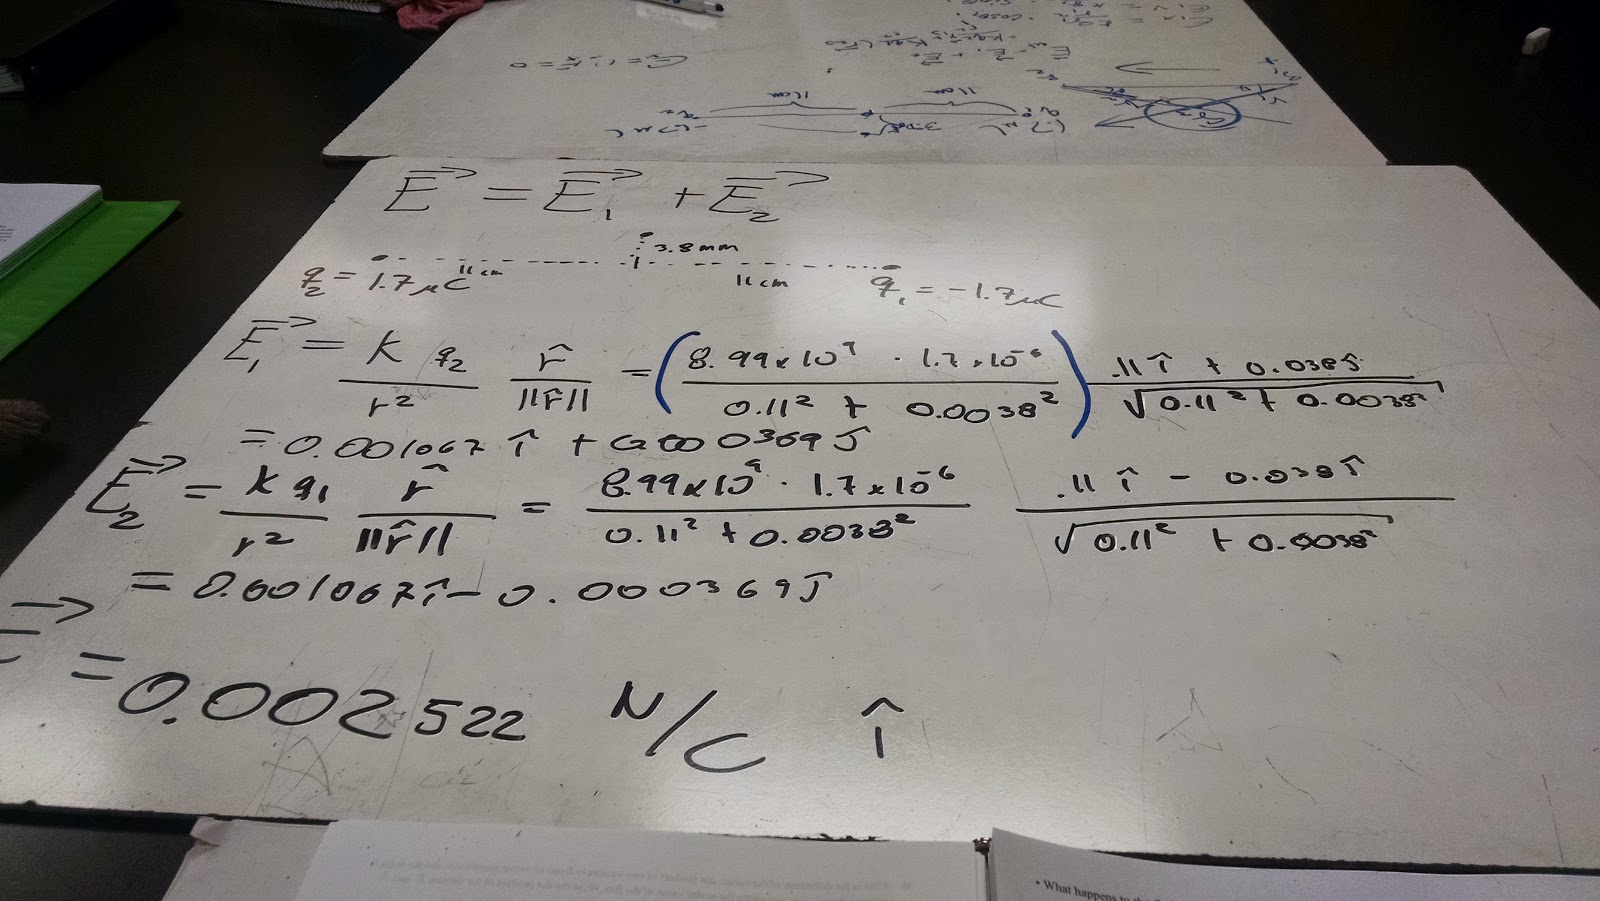
The second part of the equation then gave us values for the point charges (reusing the ones from question one, moving the second charge to a distance of x=5 cm and y=6 cm), and asking us to find the magnitude of force and the direction. Since this answer is in terms of x and y, we had two answers, one for the value in the x-axis, and one in the y-axis being added together for its magnitude
Demonstration of Electrostatic Discharge
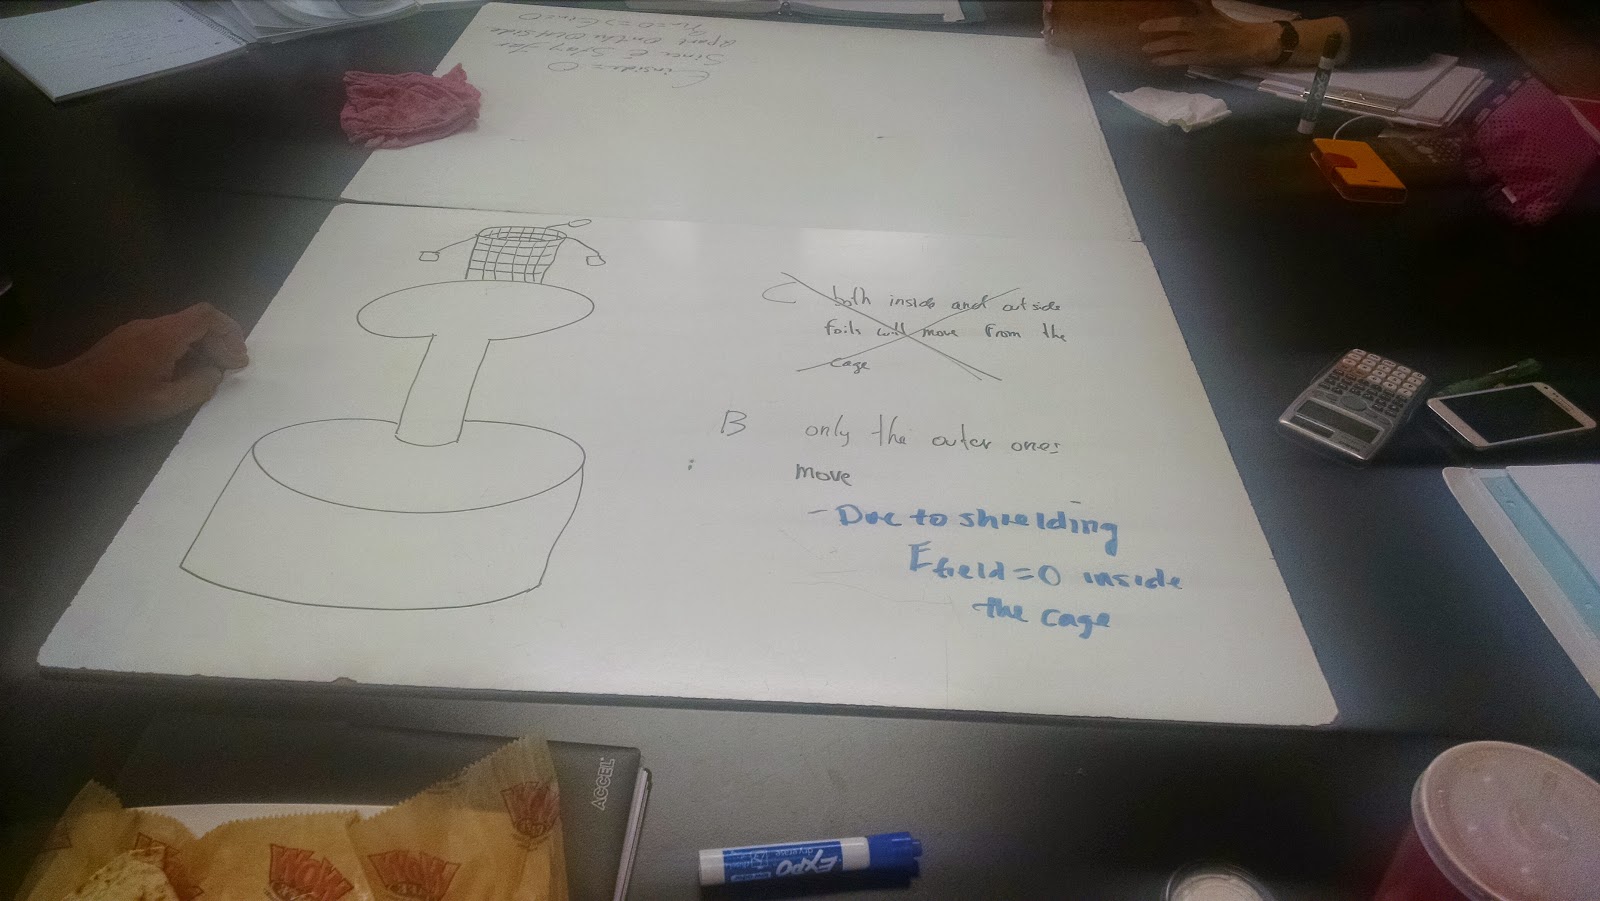
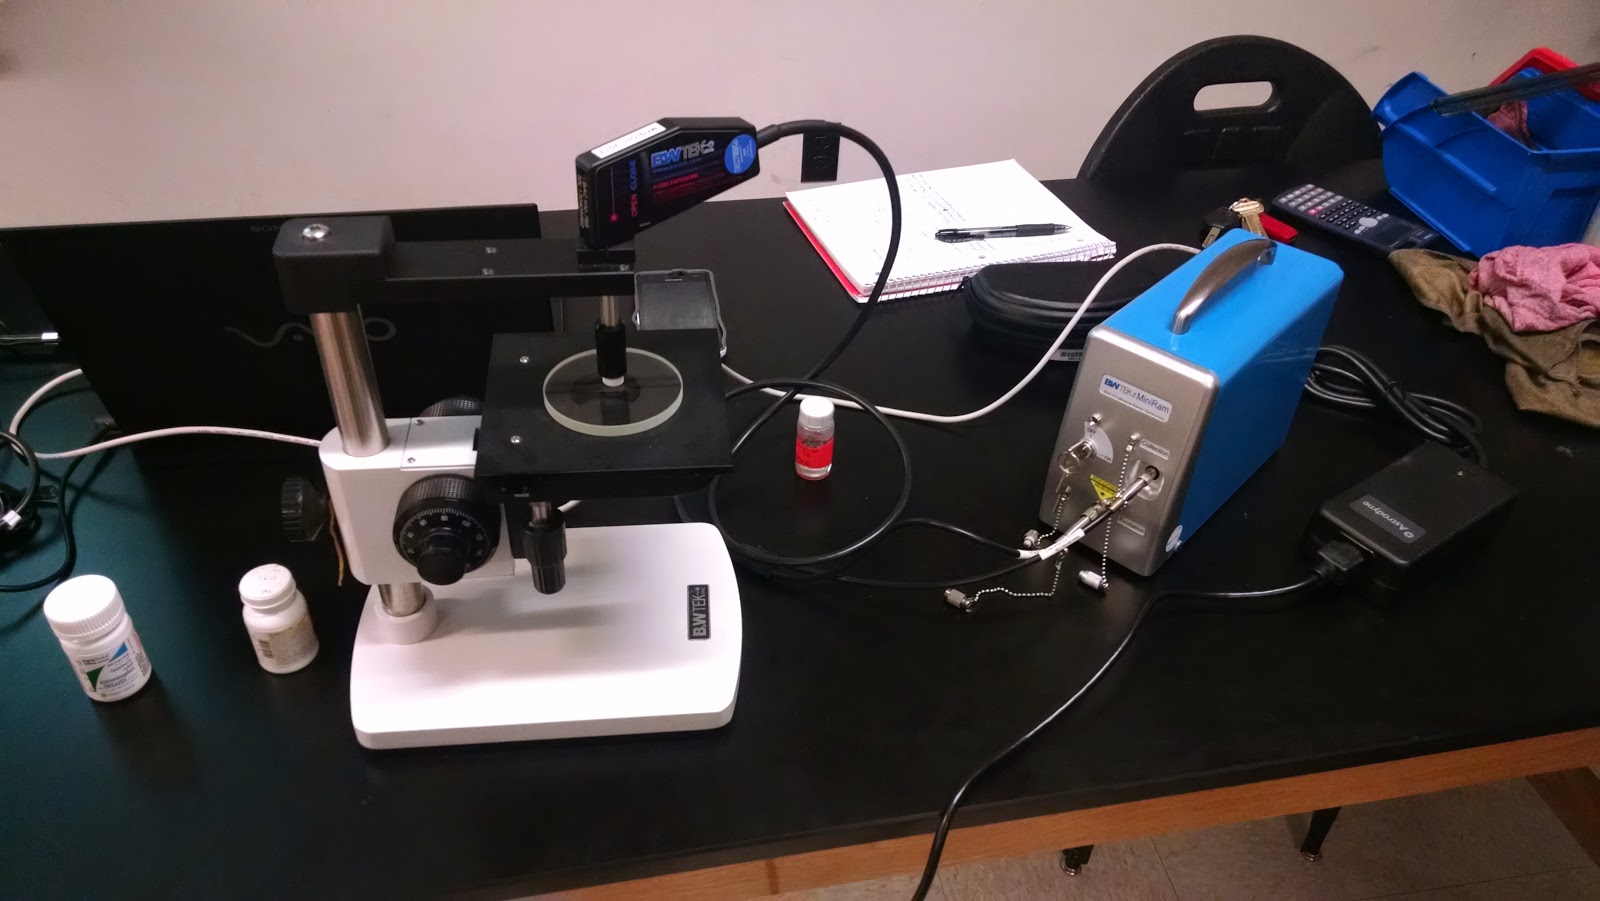
In the last portion of the lab, we got to view a Van de Graaff generation and a Storm Ball to understand Electric Discharge
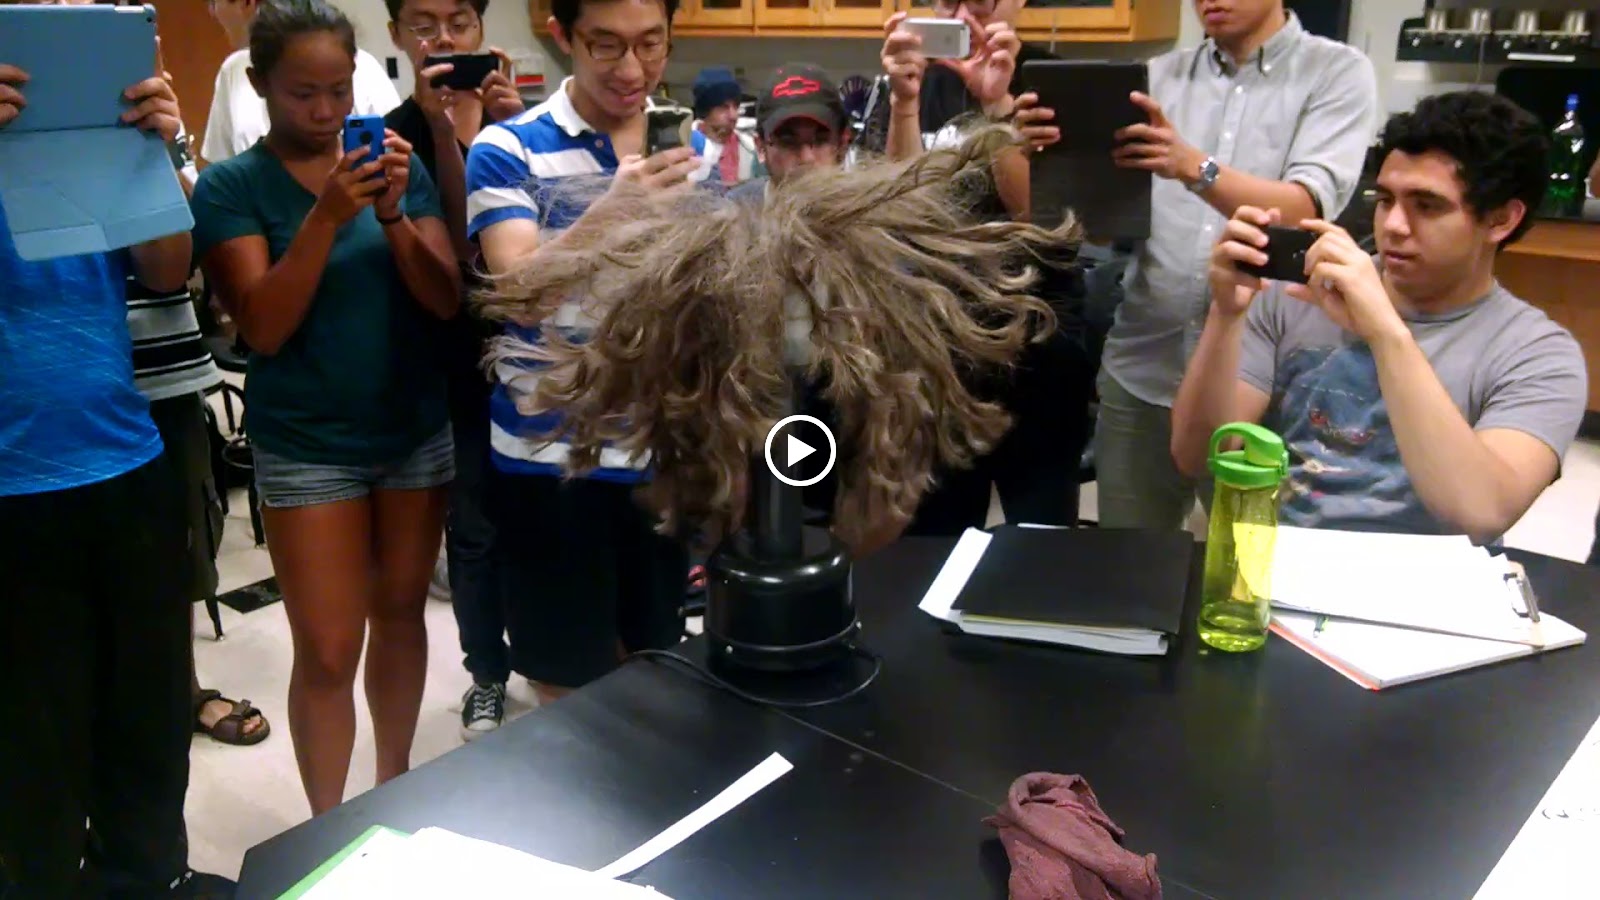 |
| Van De Graph lifting hair |
 |
| Van De Graaff spinning a helicopter rotor |
We first focused on a Van De Graaff generator and how it works as depicted above
 |
| Inside a Van De Graaff |
A Van De Graaff is a machine that transfers static eletricity from the ball like-figure to whatever touching it. Within class, we had some fun touching the Van De Graaff, then other people, as it would cause a mild static shock to the unwilling classmates.
We saw that within a Van De Graaff contained a moving belt and some copper wire, along with a motor at the bottom. The Van De Graaff generated electricity by using the motor to create electricity. The belt then carried excess electrons from the bottom of the motor to the copper wire, which acted as a brush, and picked up the electrons, spreading them to the top of the Van De Graaff system. The belt then goes down to the bottom, picks up more electrons, and repeats the process.
Its to note that in the second video with the spinning rotor, each tip of the motor picks up a charge, and spins accordingly as a result
Next is understanding how a storm ball works
 |
| An active storm ball |
A storm ball (or plasma ball as otherwise stated) is a spherical oject that emits electricity out throughout the system. If touched, the electricity will follow your finger.
A plasma ball works by having an inert gas, such as helium or neon (which this demonstration most likely has) within the system. Next electricity is pumped through the system, causing the inert gas to be excited, becoming from a gas to a plasma (the glass not only acting as a display, but as a way for the plasma to be contained) having its filaments being sent from the electrode to the inner glass.
The reason why the electricity can follow our hands is due to the fact that our hands are conductive as well, allowing us to react with electrode and plasma system.